
(pls enter on the italian translation)
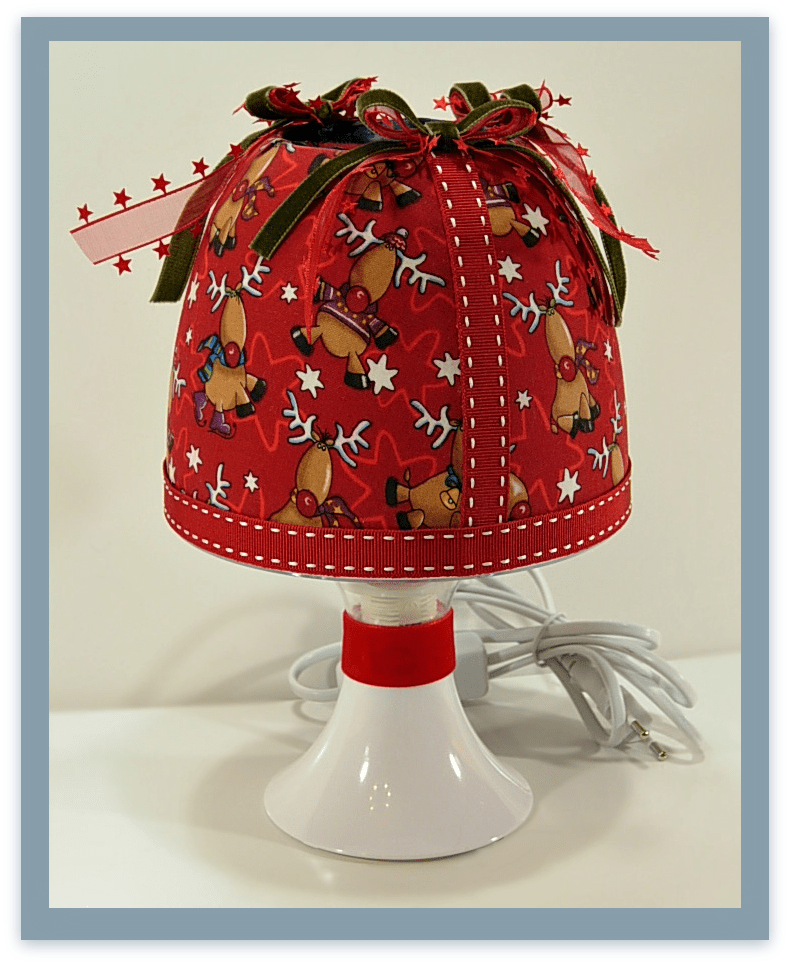
The trim or trimming (from the French passement, i.e. the action to pass, to put in order, to apply an ornament; the early French word for lace; from the Middle English “trimmen” and from the Old English “trymian”, i.e. to strengthen, to arrange, to firm) is a decorative accessory originally, and for thousands of years, made and applied by hand, the act of embellishing and garnishing something with by fastening, sewing or attaching elaborate objects, mainly using needle-and-thread-stitches, such as ribbons, lace, fabrics, buttons, bows, embroidery, ruffles, gimp threads, frills, tassels, fringes, gallons, pom-pom, braids, etc. Its origin is lost in the mists of time: it is impossible to define the beginnings of this art in a precise fashion.
 Primitive human beings in the Paleolithic Era, after the art of making elaborate tattoos to express artistic and religious feelings and to show the first signs of social and tribal distinction, decorated themselves with passementerie. The most diverse decorations were created according to incoming needs and rituals: animal skins cut into strips, bones, shells, fruits, plant fibres, stones, seeds, pearls and bells added to articles of dress, bracelets, amulets and, of course, to weapons.
 The weaving of cloth from natural fibres had its first significant evidence, especially in the East and Middle East, around 5000-4000 B.C. The trimming – and sewing which went together with this development – arrived in Europe with the Islāmic conquest. The Silk Road brought Chinese embroidery techniques to Western Asia and Europe. The industrial production of semi-finished trims began in England in 1748 and spread quickly in France and Germany.
 In 1790 Thomas Saint patented the first sewing machine. By the early 1840s, other machines began to appear. The Industrial Revolution in the 19th century shifted the textiles production from the household to the mills; as well the introduction to creative woven trims emphasized the manufacture of passementerie to enhance the beauty of garments and home decor.
 The passementier is someone who makes and sells trimmings. The passementerie can be applied with sewing stitches or embroidery on a soft material, such as fabric, leather and felt; with specific glue or adhesives on hard and stiff material and divided into a) for clothing b ) for home decor. The purposes for which it is used are mainly two: a) the structural and finishing one, to cover seams, to fix hems and edges and to prevent fabric fraying; b) the aesthetic and decorative one, to garnish and embellish.


Devi effettuare l'accesso per postare un commento.