


Follow my pawprints, hold on my smile, laugh at my jokes, walk by my side, find me where my soul flourishes, come closer to my heart, look into my dream every single day!


(pls enter on the italian translation)
The trim or trimming (from the French passement, i.e. the action to pass, to put in order, to apply an ornament; the early French word for lace; from the Middle English “trimmen” and from the Old English “trymian”, i.e. to strengthen, to arrange, to firm) is a decorative accessory originally, and for thousands of years, made and applied by hand, the act of embellishing and garnishing something with by fastening, sewing or attaching elaborate objects, mainly using needle-and-thread-stitches, such as ribbons, lace, fabrics, buttons, bows, embroidery, ruffles, gimp threads, frills, tassels, fringes, gallons, pom-pom, braids, etc. Its origin is lost in the mists of time: it is impossible to define the beginnings of this art in a precise fashion.
 Primitive human beings in the Paleolithic Era, after the art of making elaborate tattoos to express artistic and religious feelings and to show the first signs of social and tribal distinction, decorated themselves with passementerie. The most diverse decorations were created according to incoming needs and rituals: animal skins cut into strips, bones, shells, fruits, plant fibres, stones, seeds, pearls and bells added to articles of dress, bracelets, amulets and, of course, to weapons.
 The weaving of cloth from natural fibres had its first significant evidence, especially in the East and Middle East, around 5000-4000 B.C. The trimming – and sewing which went together with this development – arrived in Europe with the Islāmic conquest. The Silk Road brought Chinese embroidery techniques to Western Asia and Europe. The industrial production of semi-finished trims began in England in 1748 and spread quickly in France and Germany.
 In 1790 Thomas Saint patented the first sewing machine. By the early 1840s, other machines began to appear. The Industrial Revolution in the 19th century shifted the textiles production from the household to the mills; as well the introduction to creative woven trims emphasized the manufacture of passementerie to enhance the beauty of garments and home decor.
 The passementier is someone who makes and sells trimmings. The passementerie can be applied with sewing stitches or embroidery on a soft material, such as fabric, leather and felt; with specific glue or adhesives on hard and stiff material and divided into a) for clothing b ) for home decor. The purposes for which it is used are mainly two: a) the structural and finishing one, to cover seams, to fix hems and edges and to prevent fabric fraying; b) the aesthetic and decorative one, to garnish and embellish.
1° Step. Material :
Japanese 100% cotton fabric and two Löbbo IKEA Europe lampshades.


2° Step. Tools :
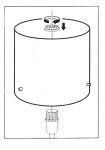
First of all I need a soft pencil to design the template on the fabric rear side and the scissors to it cut out. The vinyl glue (or special fabric-glue) and a flat brush to spread an adequate glue measure on to paste the fabric to polystyrene panel; some pegs or clips to hold and press it down while it dries.
3° Step. Fabric & Template :
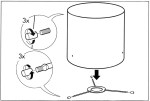
I wash and iron my fabric perfectly. It is important to draw the template to cut the fabric in the right measures. In this case, I use the polystyrene panel of the Löbbo lampshade like a template.
 I lay it on the wrong side of my fabric and trace all cutting lines with a soft pencil. With a ruler I extend each line out 2-3 cm. and trace a further edge in all directions the lines were heading. Finally, I cut the fabric carefully out with scissors or a rotary cutter. The new cover is now ready to be glued to the shade.
4° Step : Photo & Tutorial.
1° Step : Pickguard & Fabric.

 2° Step : Material & Tools.
A Strat-pickguard and an adequate beautiful 100% cotton fabric. To custom and decorate my pickguard with the decoupage technique I need first scissors to cut out my fabric and a soft pencil to design the pickguard’s template on the fabric’s rear side and vinyl glue (or special fabric-glue). Then a flat brush to spread a fair glue measure on the pickguard to paste the chosen fabric and some plastic or wooden clips, or pegs, to apply around the edges to hold the fabric down while the glue dries. Finally, I need a satin water-based varnish gel to create a protective and anti-scratch film with a good resistance to mechanical agents. I apply a thick and uniform coat with a specific flat smooth brush. Let it dry for at least four hours and then I repeat twice, or more times, as to get a hard, solid and strong last finishing.
3° Step : Photo & Tutorial.
The template. It is important to draw the template, in order to cut the fabric in the right measures. First of all I take a large piece of thin paper, or pattern paper, (or more paper sheets joined together with adhesive tape) and a soft pencil. Then I lay the shade (already provided for its polystyrene panels) on it and, from the vertical rear seam, I begin to roll the shade and to trace around the rims on all sides to the starting point. With a ruler I extend the sides of each line out 2-3 cm. and trace a further edge in all directions the lines were heading. Finally, I cut the template out of the piece of paper with scissors or a craft cutter. Now the template is ready.
Preparing the fabric. To select the right fabric to cover my shade, in addition to considering colour and design, I have to consider its transparency as well as the amount of heat my lamp expels because I do not want my chosen material to melt. That’s why I read the fabric label carefully to determine its heat sensitivity. Afterwards I wash and iron the fabric perfectly. I lay the template on the wrong fabric side and I trace it with a soft pencil.


Checking up fabric design. The above mentioned template process, although laborious, helps me to understand everytime if the fabric design is suitable for my lampshade. The correct fabric position is important: the design must be in evidence, both on the front and on the rear shape side; it should not be cut out badly on the edges and pretty harmonious! On the contrary, I can always remove the fabric and take it on again, or even replace it, in order to get a first-rate colour-rich canvas.


Cutting the fabric. I place the template on the wrong side of my fabric and trace all cutting lines with a soft pencil. I cut the fabric out carefully. The new cover is now ready to be glued to the shade.

Devi effettuare l'accesso per postare un commento.