


Follow my pawprints, hold on my smile, laugh at my jokes, walk by my side, find me where my soul flourishes, come closer to my heart, look into my dream every single day!

Come misurare e tagliare il tessuto in modo sicuro. Per definizione, il sottomano, avv. e s. m. [comp. di sotto- e mano]. – 1. Come avverbio, a portata di mano: tengo sempre s. gli arnesi necessarî. – 2. Come sostantivo maschile (pl. sottomani), cartella ricoperta di pelle, tela o plastica, che si usa tenere sulla scrivania per appoggiarvi il foglio su cui si deve scrivere e come custodia per fogli, buste e simili.
Il sottomano, o tappetino da taglio, è uno strumento perfetto per soddisfare alcuni requisiti generali: progettere le superfici di lavoro; rendere più facile la misurazione; offrire un’utile guida per la valutazione e la determinazione di grandezze, dimensioni e proporzioni. La sua griglia, semplice da leggere, marcata su uno o entrambi i lati, favorisce il disegno, la misura e il taglio della stoffa e rappresenta una significativa combinazione tra la precisione del lavoro manuale e la misurazione senza errori.

Il sottomano di protezione è realizzato con 3 o 5 strati compositi di uno specifico vinile elastico, che si rimargina completamente se inciso, tagliato, segnato: ancora una volta, di polipropilene riciclabile al 100% per una gestione e uno smaltimento ecologicamente responsabile. Di lunga durata, performante, antiscivolo, anti-riflesso, idrorepellente al versamento accidentale di qualsiasi liquido, con superficie autorigenerante che è progettata per resistere a taglierine, rotelle cutter, coltelli da incisore, frese standard e lame multiuso. Insomma, il tappetino può essere tagliato e tagliato ripetutamente senza che rimangano fastidiosi segni, linee o abrasioni visibili. Di fatto, la sua speciale superficie previene e impedisce alle lame di perdere l’affilatura o smussarsi.

Il sottomano è disponibile in diverse dimensioni: da 22 x 30 cm. a 60 x 90 cm. fino a 180 x 90 cm. Lo spessore può variare da 1,6 mm. (faccia monouso, unilaterale) fino a 3 mm. (faccia doppio uso, bilaterale, extra-resistente). Ogni elemento contiene misure in pollici e/o centimetri marcati sulla superficie superiore; è contrassegnato con un tipo di griglia da ½ pollice con angoli di taglio; possiede una graduazione da ¼ di pollice sulla base e un bordo verticale sinistro continuo.
Il sottomano reversibile è solitamente verde sulla faccia anteriore e nero su quella retrostante. Entrambe però dispongono di guide di misurazione lineari, in sbieco e trasversali, a 30 – 45 e 60 gradi. Tutti i quattro bordi sono completamente numerati e graduati con appositi marcatori per estendere la base dello zero oltre la linea di taglio standard.

Il sottomano offre un’elevata qualità professionale per le arti grafiche, gli hobby e le applicazioni industriali; in sostanza, è essenziale per ogni progetto di cucito, trapuntatura, quilting e patchwork; perfettamente dimensionato per lo scrapbooking, come pure, per il lavoro su carta, d’impaginazione manuale, per le carte decorative e l’Art Journal; consigliato per gli esperti della scrittura a mano, i designer e i fotografi, nonchè a chiunque abbia un desktop da proteggere, o bisogno di un ulteriore piano d’appoggio reversibile per scrivere e disegnare.

Un tappetino da taglio piccolo è facile da trasportare e facile da riporre per coloro che hanno spazi di lavoro limitati e piccoli progetti. Uno extra-large, invece, dà abbondante spazio a una vasta gamma di piani e idee; è molto ben dimensionato per tagliare larghezze piene, quadrati, triangoli, figure speciali e lunghe strisce; la grande superficie della sua griglia di misurazione, di facile e immediata lettura, permette di girarlo per un uso duplice e multiplo in parallelo.
Il tappetino da taglio rotante ha un design specifico per quilting e appliquè accurati e senza grattacapi: non è necessario muoversi attorno al progetto per tagliarlo o dargli forma! E’ economico e rapido, ideale per squadrare e pareggiare grandi blocchi di stoffa; e molto più di questo, per via della sua caratteristica di ruotare a 360,° impedisce l’improvviso, indesiderato scivolamento del tessuto.
Il tappetino da taglio traslucido offre una superficie protettiva ai tavoli luminosi e ai piani delle scrivanie, con linee guida bianche su un lato per tagli di precisione e colorate sul lato opposto per supportare la misurazione perfetta, nonchè una varietà di altre possibili applicazioni.

Il sottomano deve essere stoccato e conservato piatto, in orizzontale, e lontano dalla luce solare, dalle fonti di calore e dal freddo. Può essere pulito con acqua tiepida e sapone neutro.

Dove acquistare.
1) Negozi on-line dei vari produttori (vi sono in rete numerosi siti web dei più diversi produttori mondiali).
2) Esposizioni e fiere specializzate in patchwork, quilting e tessuti (da selezionare sui vari motori di ricerca; per il Nord Italia vedi anche in homepage la sezione “Fairs & Events”).
3) Mercerie e punti vendita specializzati in quilting, patchwork e tessuti. Per la ricerca on line in Italia selezionare su: | PagineGialle.it = (nome vs. città).paginegialle.it / (nome vs. regione) / (nome vs. città) / mercerie.html
(Fonti: grazie a Google e Pinterest per le immagini, all’Enciclopedia Treccani per la definizione, ai diversi produttori per i dati e i testi tecnici on-line)
How to measure and cut fabric safely. The cutting mat is the perfect tool for some general requirements: to protect work surfaces, to make measuring easy, to give a useful measuring guide, i.e. an easy-to-read grid on one or both sides for precise drawing and cutting, to offer a significant combination for crafting precision and mistake-free measuring.
The protective cutting mat is made with 3 or 5 composite layers of resilient vinyl that heals completely; again, of 100% recyclable polypropylene for an environmentally responsible disposal. Long-lasting, non-slip, non-glare, water-repellent to liquid spills, self-healing surfaces that are designed for rotary cutters, art knives, standard-duty cutters and utility blades: the mat can be cut and slashed repeatedly without displaying marks, cutting lines or abrasions. In fact, its special surface prevents blades from becoming dull.
How to measure fabric. A ruler is a ribbon of cloth or a strip of wood, plastic, metal or other material, which has straight edges usually graduated in millimetres or inches. It is a common measuring tool used in geometry, printing industry, technical drawing and in quilting/patchwork projects and has three main purposes: to measure distances, straight lines and solid bodies; to mark and score a line on a surface with a rotary cutter; to help drawing accurate graphs, flexible geometric shapes and flat curves.

There are different types of rulers: standard slotted rulers, standard and flexible tape measures, rigid wooden or metallic folding carpenter’s rulers, self-retracting roll-up tape measures, line gauges, sewing gauges, straight-edges, etc.

Since the Paleolithic Era primitive human beings adopted measuring devices, according to incoming needs and rituals, mainly consisting of natural fibers, marked strips of leather or ivory sticks. Gilded bronze rulers dated 206 B.C. were discovered in China in the Hanzhong Prefecture (in the southwest of Shaanxi Province). In the 16th century wooden carpenter’s rulers and other measuring tools were found on board of the merchant carrack Mary Rose. Anton J. Ullrich invented the folding ruler in 1851. In 1922 Hiram A. Farrand started mass production of his rapid ruler. The spring tape measure existed since Alvin J. Fellows’ patent in 1868, but did not come into wide usage until the early 1900s, when carpenters began slowly adopting Farrand’s design as the one more commonly used. And which is the today design of all modern tape measures.
1° Step. Material :
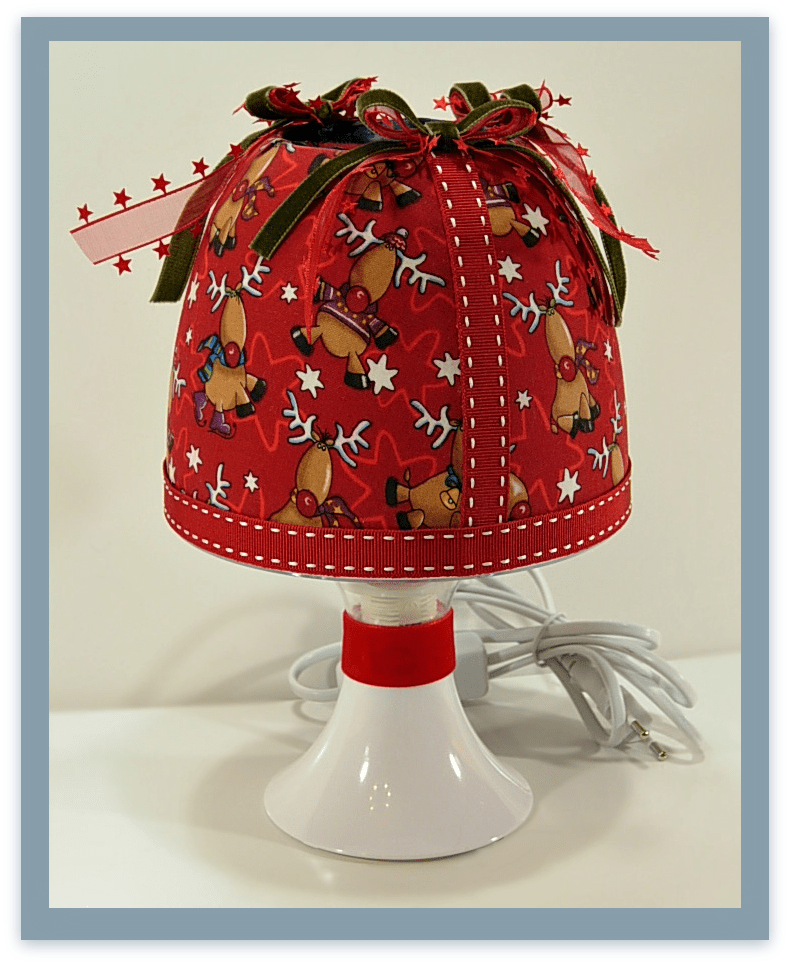
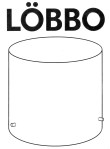
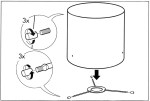
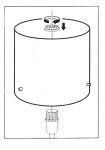
Japanese 100% cotton fabric and two Löbbo IKEA Europe lampshades.


2° Step. Tools :
First of all I need a soft pencil to design the template on the fabric rear side and the scissors to it cut out. The vinyl glue (or special fabric-glue) and a flat brush to spread an adequate glue measure on to paste the fabric to polystyrene panel; some pegs or clips to hold and press it down while it dries.
3° Step. Fabric & Template :
I wash and iron my fabric perfectly. It is important to draw the template to cut the fabric in the right measures. In this case, I use the polystyrene panel of the Löbbo lampshade like a template.
 I lay it on the wrong side of my fabric and trace all cutting lines with a soft pencil. With a ruler I extend each line out 2-3 cm. and trace a further edge in all directions the lines were heading. Finally, I cut the fabric carefully out with scissors or a rotary cutter. The new cover is now ready to be glued to the shade.
4° Step : Photo & Tutorial.
1° Step : Pickguard & Fabric.

 2° Step : Material & Tools.
A Strat-pickguard and an adequate beautiful 100% cotton fabric. To custom and decorate my pickguard with the decoupage technique I need first scissors to cut out my fabric and a soft pencil to design the pickguard’s template on the fabric’s rear side and vinyl glue (or special fabric-glue). Then a flat brush to spread a fair glue measure on the pickguard to paste the chosen fabric and some plastic or wooden clips, or pegs, to apply around the edges to hold the fabric down while the glue dries. Finally, I need a satin water-based varnish gel to create a protective and anti-scratch film with a good resistance to mechanical agents. I apply a thick and uniform coat with a specific flat smooth brush. Let it dry for at least four hours and then I repeat twice, or more times, as to get a hard, solid and strong last finishing.
3° Step : Photo & Tutorial.
(pls enter on the italian translation)
A rotary cutter is a tool used to cut fabric and mainly composed by three parts: a circular rotating blade, an ergonomic handle and an open/shut safety latch.


A rotary cutter combines the high-cutting efficiency and balance technology of the needlework scissors with the unique manufacturing process to the functional need to cut contemporaneously out multiple layers of light-or heavyweight fabric materials to straight lines, as well as curves, into shapes and pieces for craft projects. Quilting and patchwork become easier and time-saving, as it avoids working exhausting up to mark and cut single fabric patches every time and speeds certainly up the quilt assembly.
The Olfa Company introduced the first rotary cutter in 1979 for garment making. It was handy in place of scissors and quickly adopted by quilters who began the patchwork-revolution!

The blade. Circular and rolling, sharp and precise, swift and all-purpose: there is a blade to suit every need. The blade is made of high-quality carbide coated tungsten steel or titanium for an unparalleled sharpness; as well as it is double-honed for extra cutting capacity and durability.

It is available in several different sizes and diameters, from mm. 18 to mm. 60. Usually the larger the blade the easier is to slice through the fabric’s layers. More than a single rotary cutter will be necessary for some tasks than others. To cut out smoothly and easily through multi-layers, the blade mm. 60 in diameter is perfect and exact. Versatile and accurate for quilting, sewing and craft projects, the basic blade mm. 45 creates a safe and comfortable cut. As well, the small blade mm. 18 is a good solution to cut around sharp curves.
The template. It is important to draw the template, in order to cut the fabric in the right measures. First of all I take a large piece of thin paper, or pattern paper, (or more paper sheets joined together with adhesive tape) and a soft pencil. Then I lay the shade (already provided for its polystyrene panels) on it and, from the vertical rear seam, I begin to roll the shade and to trace around the rims on all sides to the starting point. With a ruler I extend the sides of each line out 2-3 cm. and trace a further edge in all directions the lines were heading. Finally, I cut the template out of the piece of paper with scissors or a craft cutter. Now the template is ready.
Preparing the fabric. To select the right fabric to cover my shade, in addition to considering colour and design, I have to consider its transparency as well as the amount of heat my lamp expels because I do not want my chosen material to melt. That’s why I read the fabric label carefully to determine its heat sensitivity. Afterwards I wash and iron the fabric perfectly. I lay the template on the wrong fabric side and I trace it with a soft pencil.


Checking up fabric design. The above mentioned template process, although laborious, helps me to understand everytime if the fabric design is suitable for my lampshade. The correct fabric position is important: the design must be in evidence, both on the front and on the rear shape side; it should not be cut out badly on the edges and pretty harmonious! On the contrary, I can always remove the fabric and take it on again, or even replace it, in order to get a first-rate colour-rich canvas.


Cutting the fabric. I place the template on the wrong side of my fabric and trace all cutting lines with a soft pencil. I cut the fabric out carefully. The new cover is now ready to be glued to the shade.

Devi effettuare l'accesso per postare un commento.